
How to Edit a Page in the Avada Theme
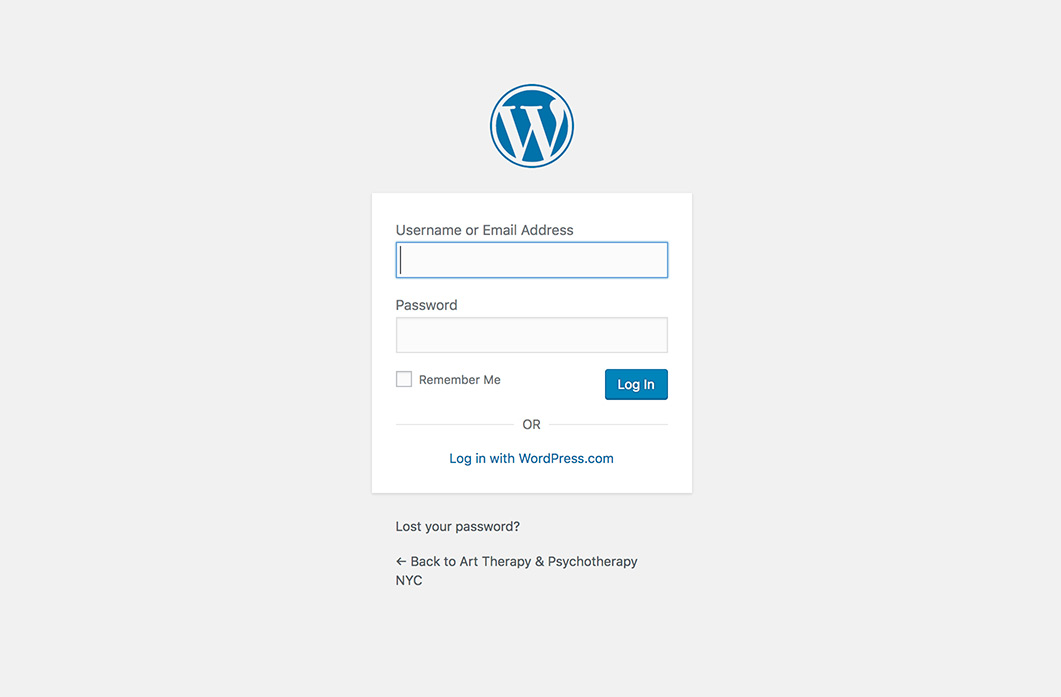
1. Log into your WordPress Dashboard.
If your site was designed by me, I have provided you with your username and login info. The admin screen is usually found at https://yoursitename.com/wp-admin. Enter your username and password and click Log In.
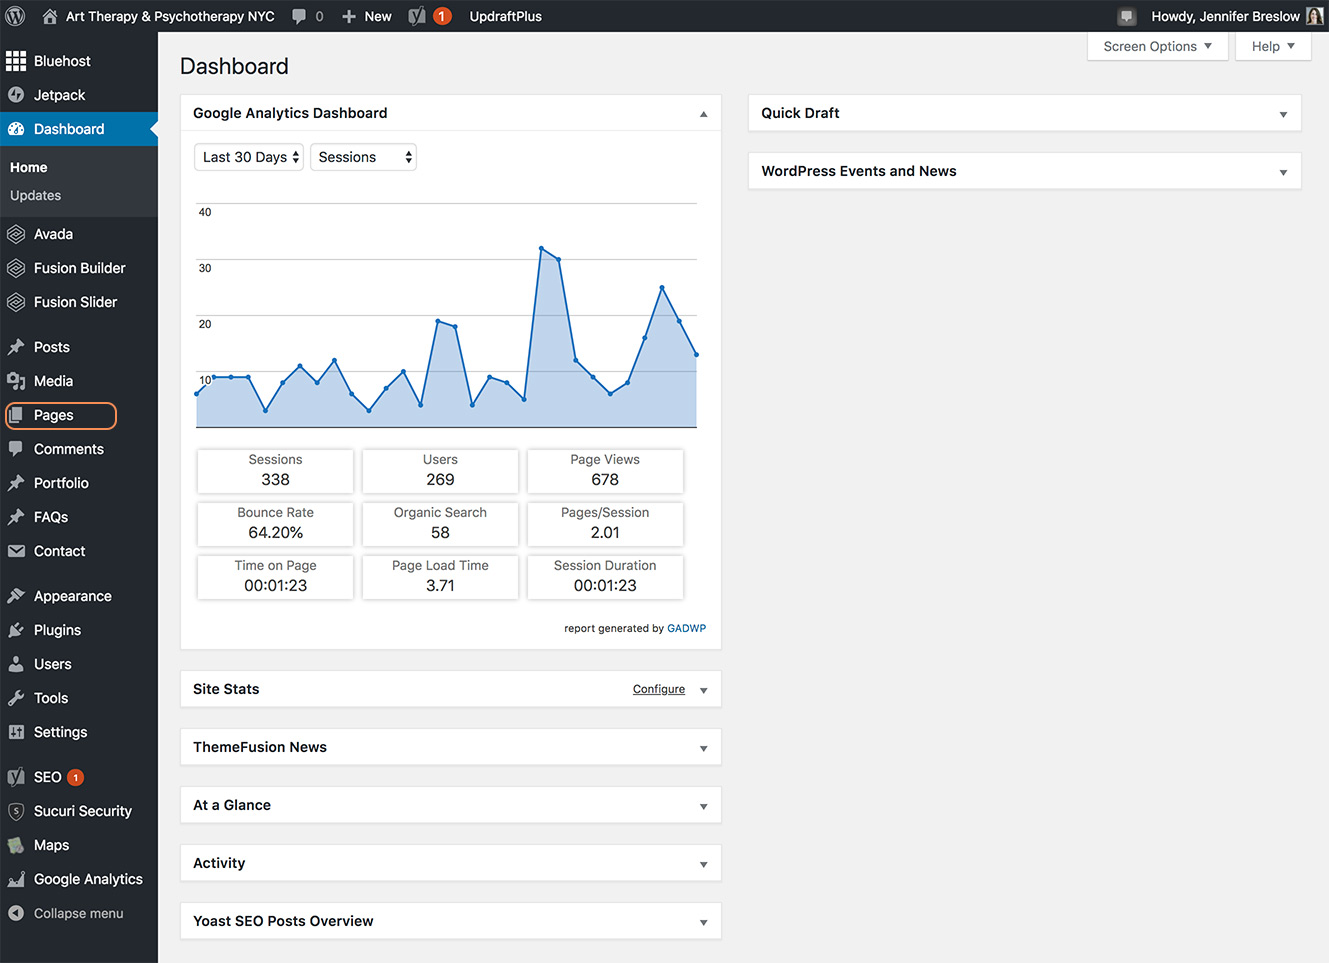
2. Find the Pages Section on the Dashboard.
Once you have logged in, you will land on the WordPress Dashboard. In the black column on the left, find the Pages Tab. Click on Pages.
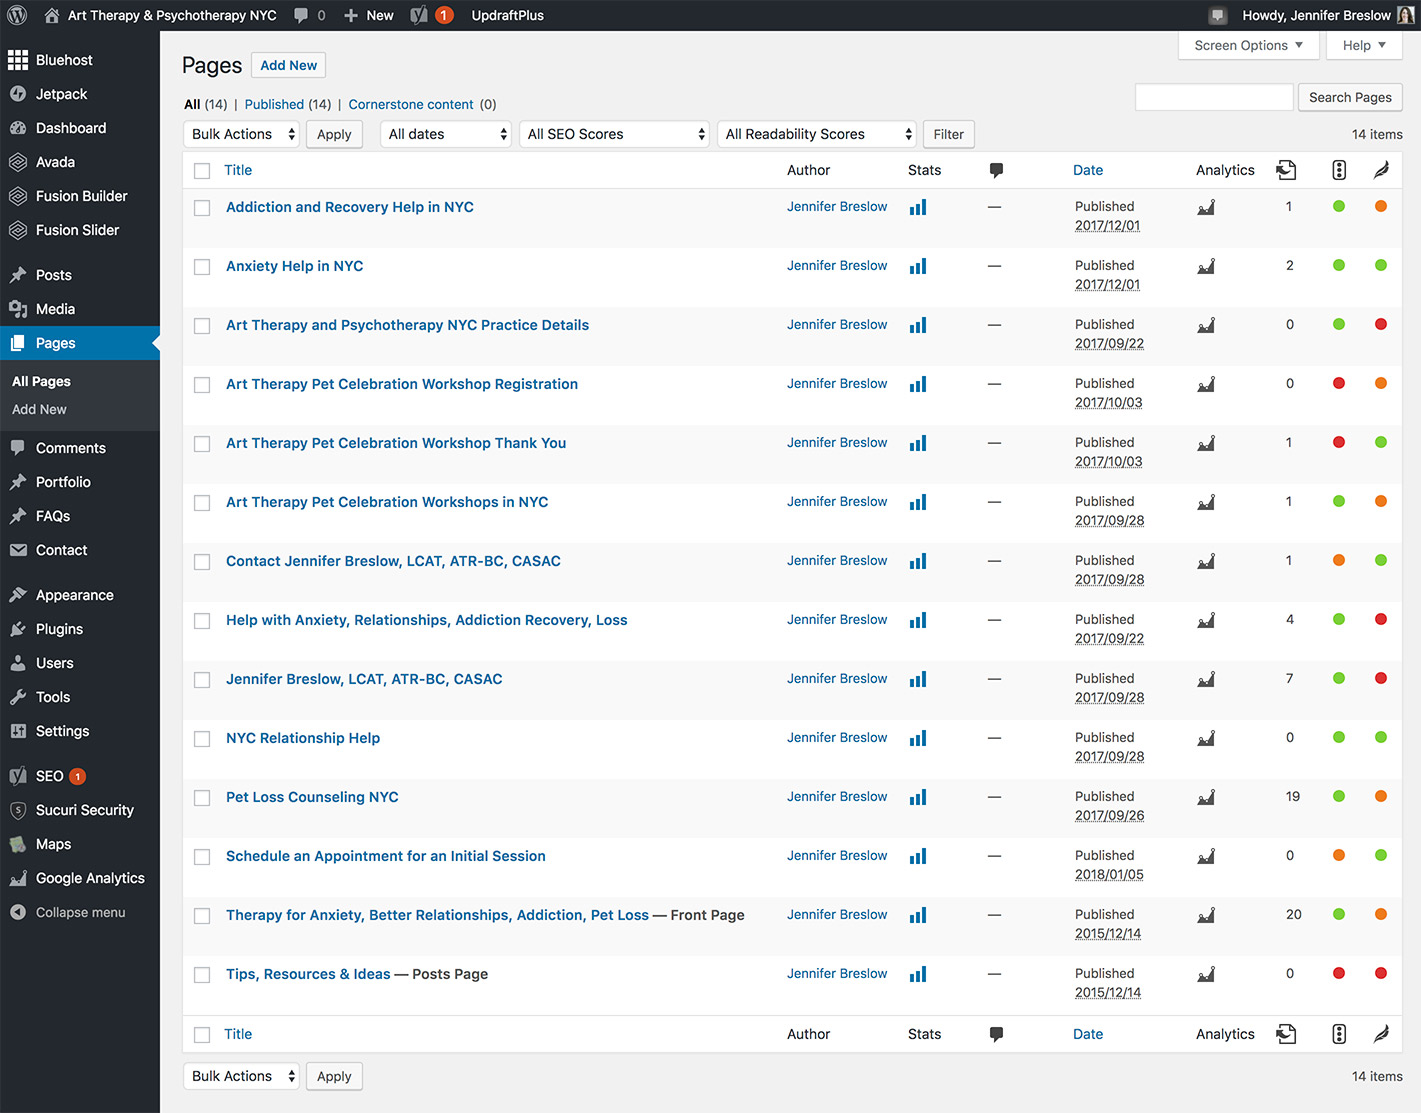
Once you have clicked Pages, you will land on a screen that shows all the pages on your site. Select the page you would like to edit by clicking on the title. For this example, I am going to select the homepage, notated by “–Front Page.” (The blog page is notated with “–Posts Page.”)
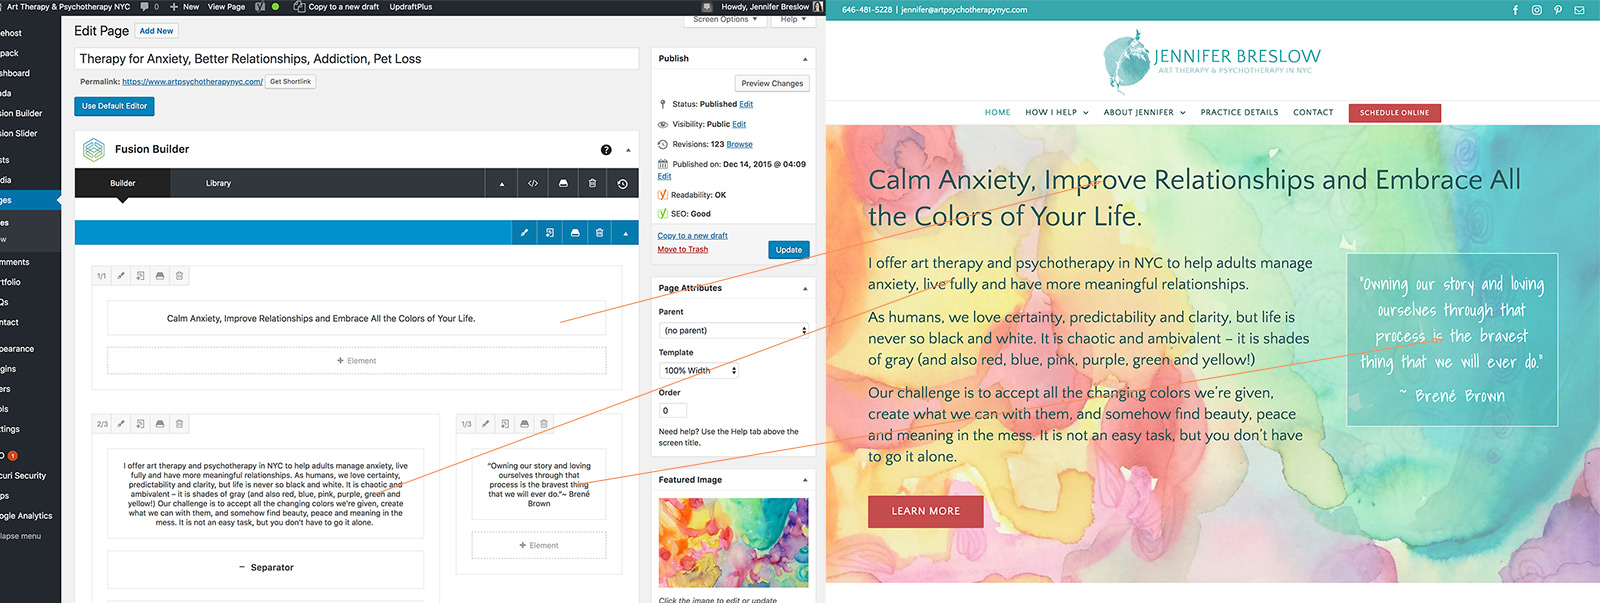
Once you’ve clicked on page you want to edit, it will open up. The Avada theme uses something called Fusion Page Builder, which lays out the pages in separate sections. So when you are looking at your page, you will initially see a bunch of boxes that correspond to parts of your webpage. For example, this section below relates to the top part of my homepage:
3. Edit Text on the Page
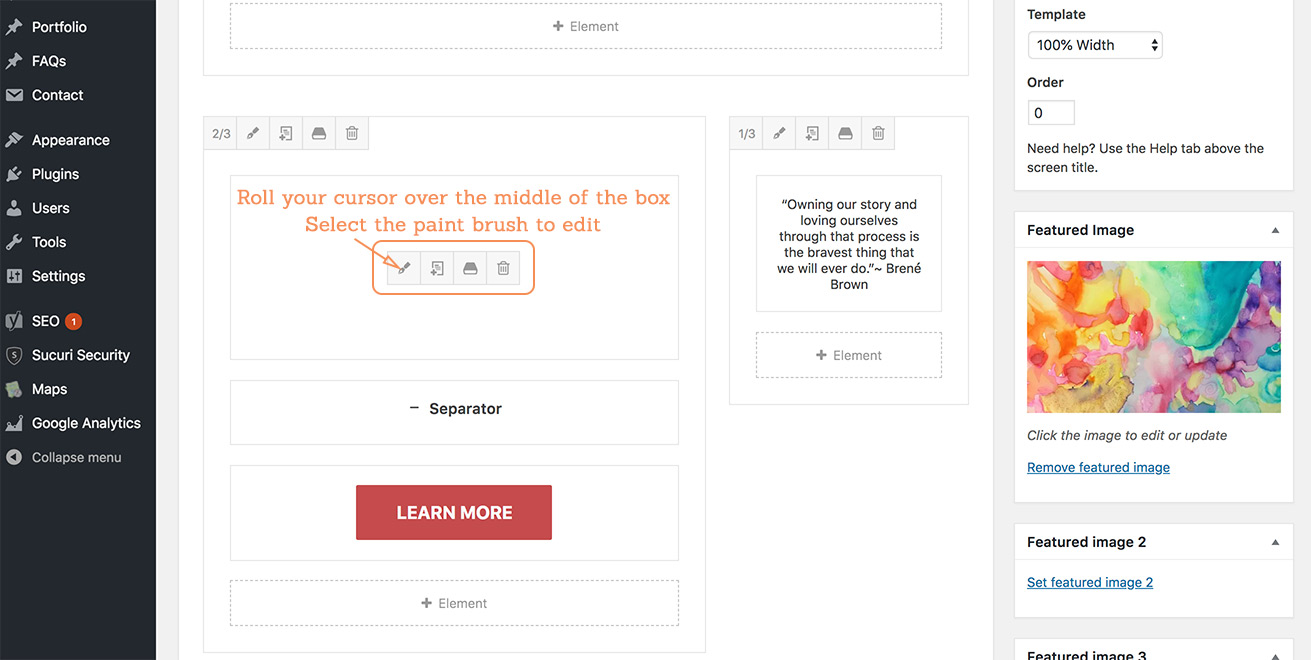
If you want to edit text in one of sections, roll your curser over the middle of the box you wish to edit. Then click on the paintbrush icon to open that content box so you can make changes.
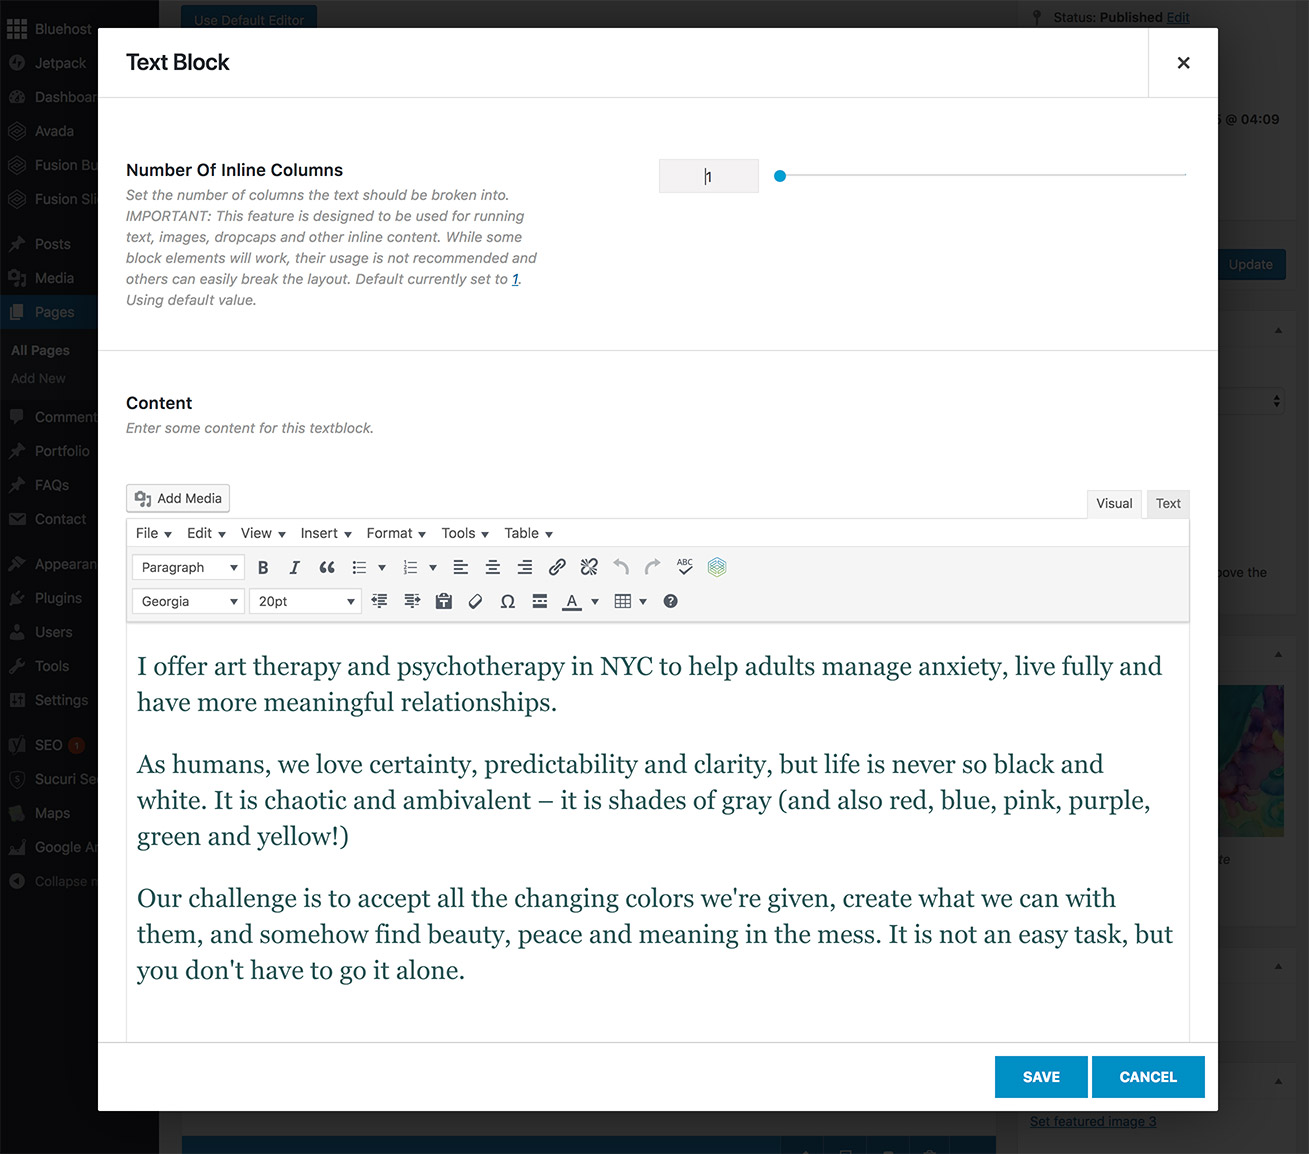
Once you click on the paint brush icon, the text block will open up for you to edit. Go ahead and make your text changes the way you would in a normal text editor. Then click on the blue Save button.
3. Publishing your Page Edits
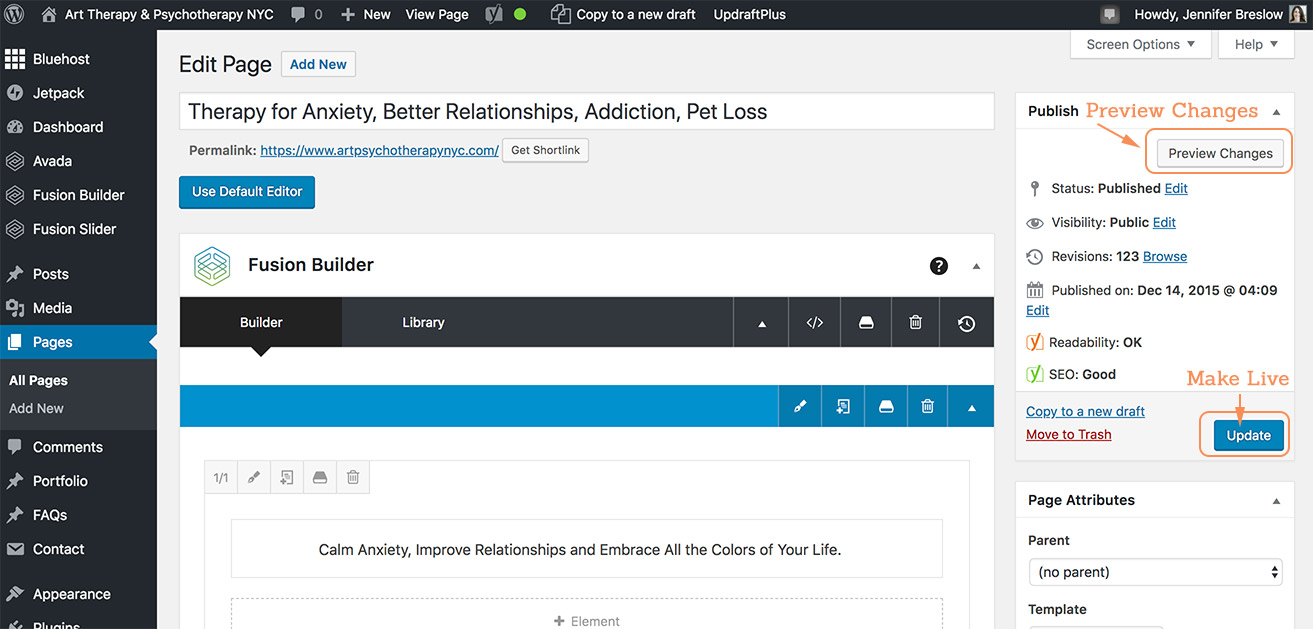
Once you’ve made the changes you want to on your page, you are ready to make them live on your site. Scroll up to the top of the page so you can see the Publish box. If you want to see what your edits look like before making them live on the site, click on the Preview Changes button. A new window will open up showing you what the webpage looks like. If you are happy with it, you can click on the blue Update button to make the changes live on your site. Be sure to click this button, or your changes won’t be saved!
That’s it! You’ve edited the text on your web page. Need help adding a blog post? Go here »
