How to Add a Blog Post in the Avada Theme
1. Log into your WordPress Dashboard.
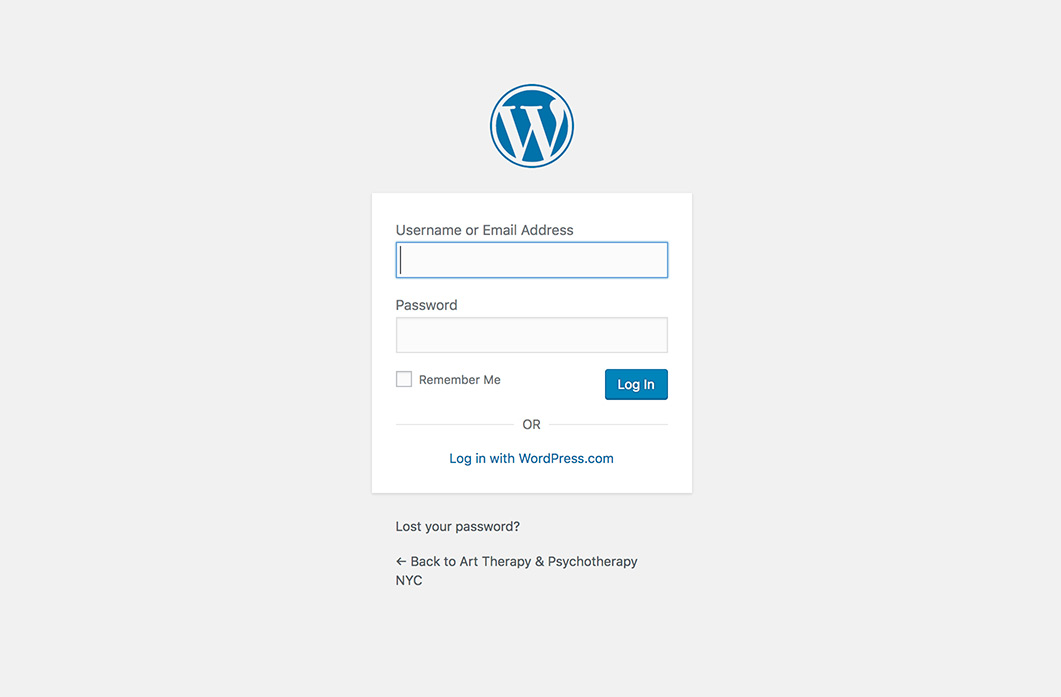
If your site was designed by me, I have provided you with your username and login info. The admin screen is usually found at https://yoursitename.com/wp-admin. Enter your username and password and click Log In.
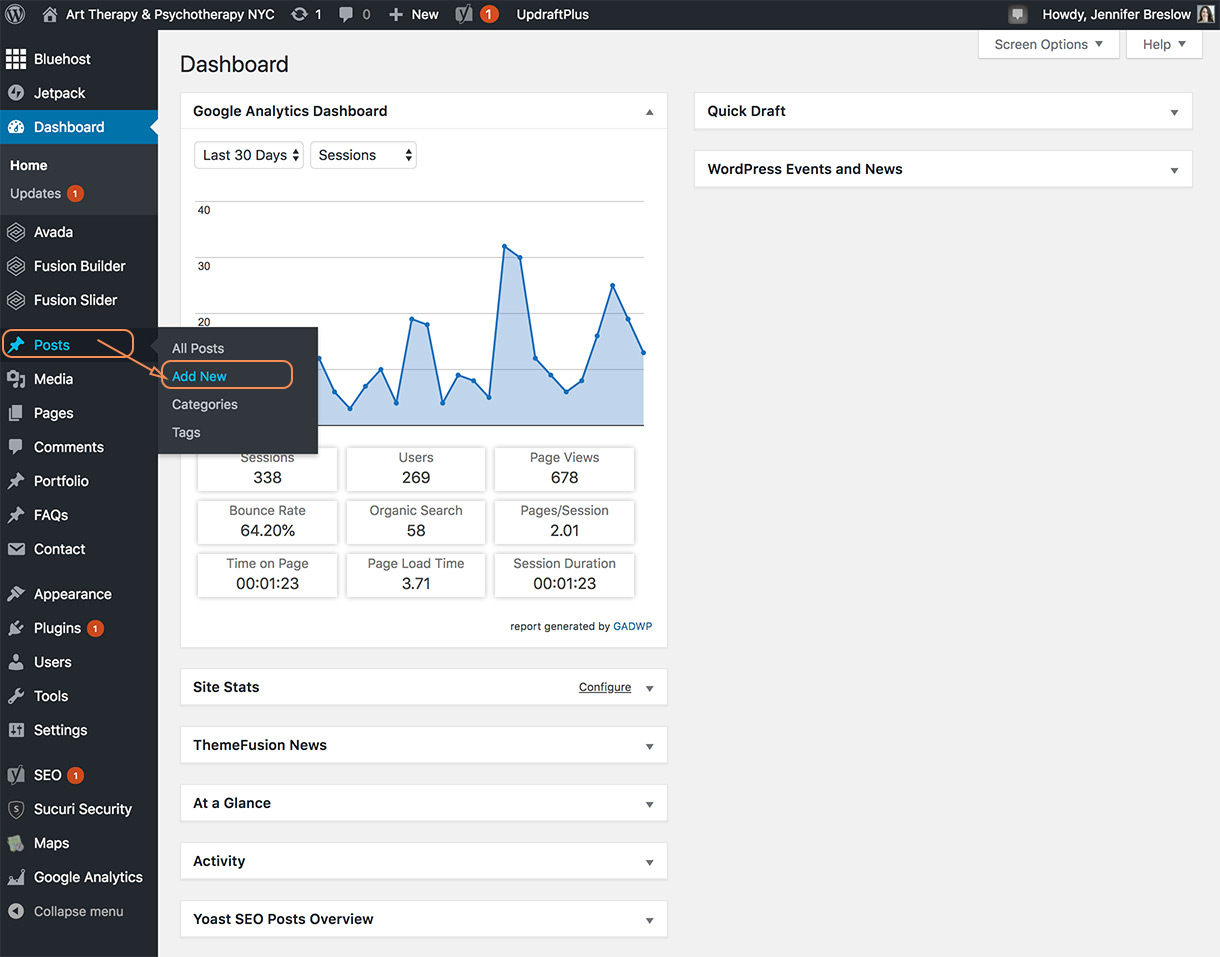
2. Find the Posts Section on the Dashboard.
Once you have logged in, you will land on the WordPress Dashboard. In the black column on the left, find the Posts Tab. When you rollover this tab with your cursor, it will open up the options to view all your posts, add a new posts, or categories and tags. Click on Add New.
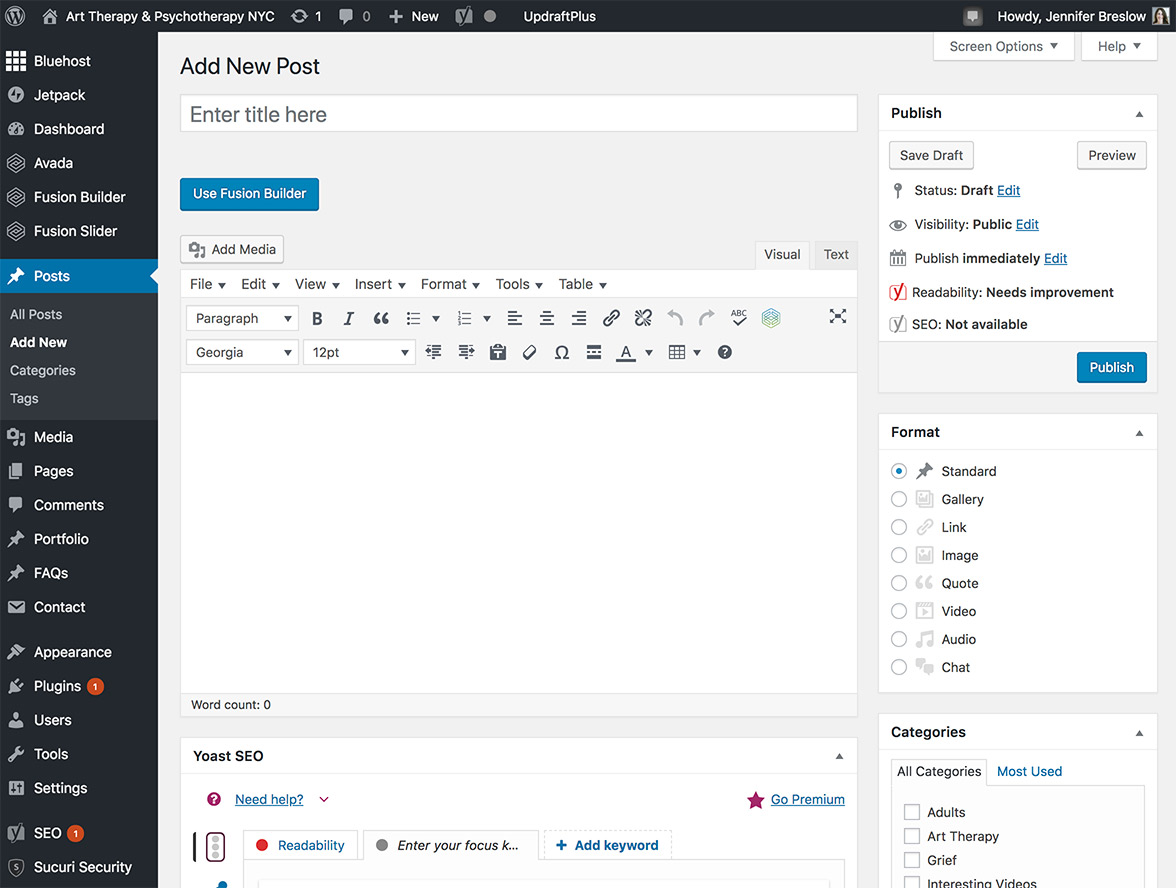
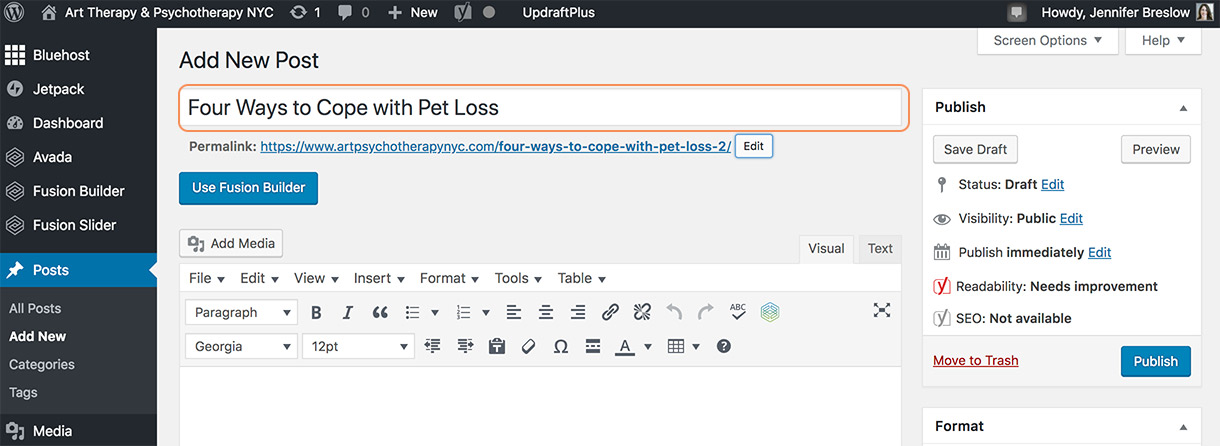
Once you have clicked Add New, you will land on the new post screen:
3. Add the Title to your Post
Where it says “Enter title here,” enter the title of your blog post. In this example, I am calling my post, “Four Ways to Cope with Pet Loss.”
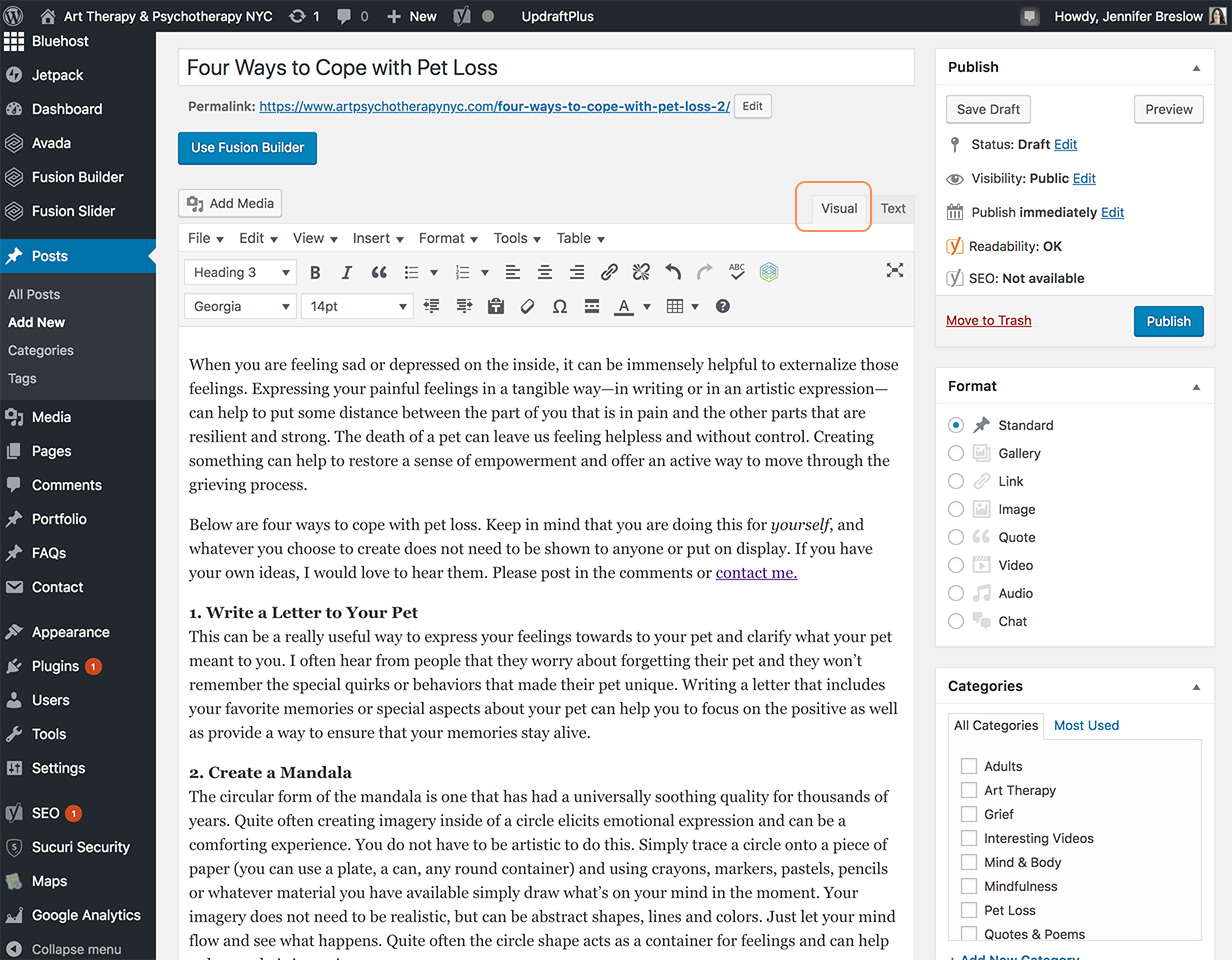
4. Add the Content to Your Post
In the large text box below, type your blog post content. Be sure you are on the “Visual Tab” and not the “Text” tab.
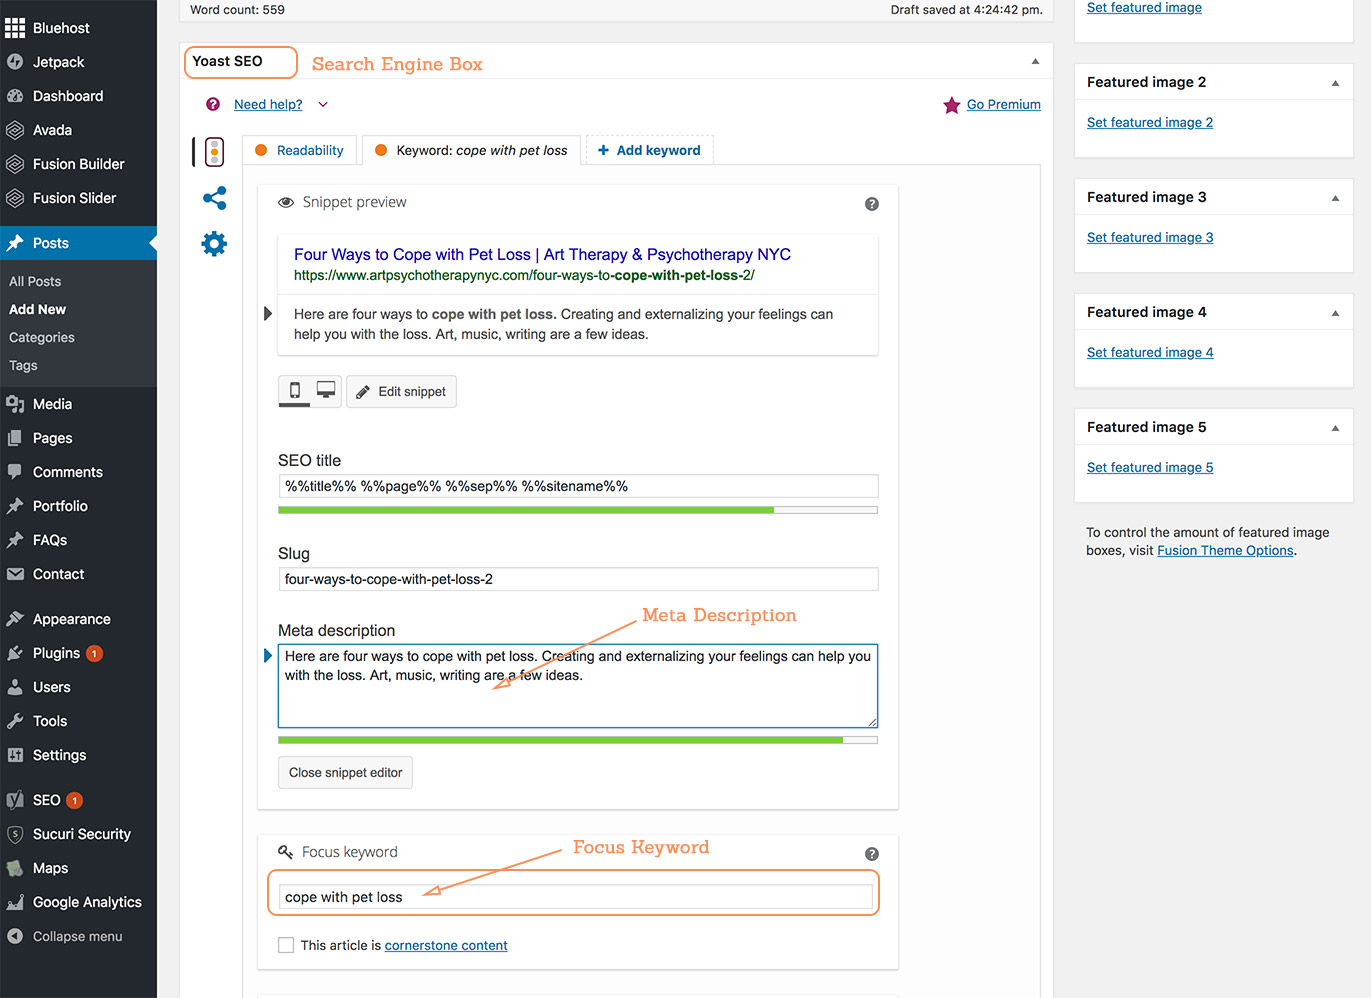
5. Add Search Engine Optimization for your Post
Below the content section, you will find the Yoast SEO box. If your site was designed by me, I’ve added the Yoast SEO plugin to best optimize for search engines. In the “Meta Description” box, enter up to 155 characters describing what your post is about. This is the text that will show up on Google’s search results page, so it should be very specific to your post topic. In the “Focus Keyword” box, add a few words that capture what your post is about. It is a good idea to have these words/phrase appear in the Meta Description as well as your post’s title. The focus keyword is what someone might type into a Google search.
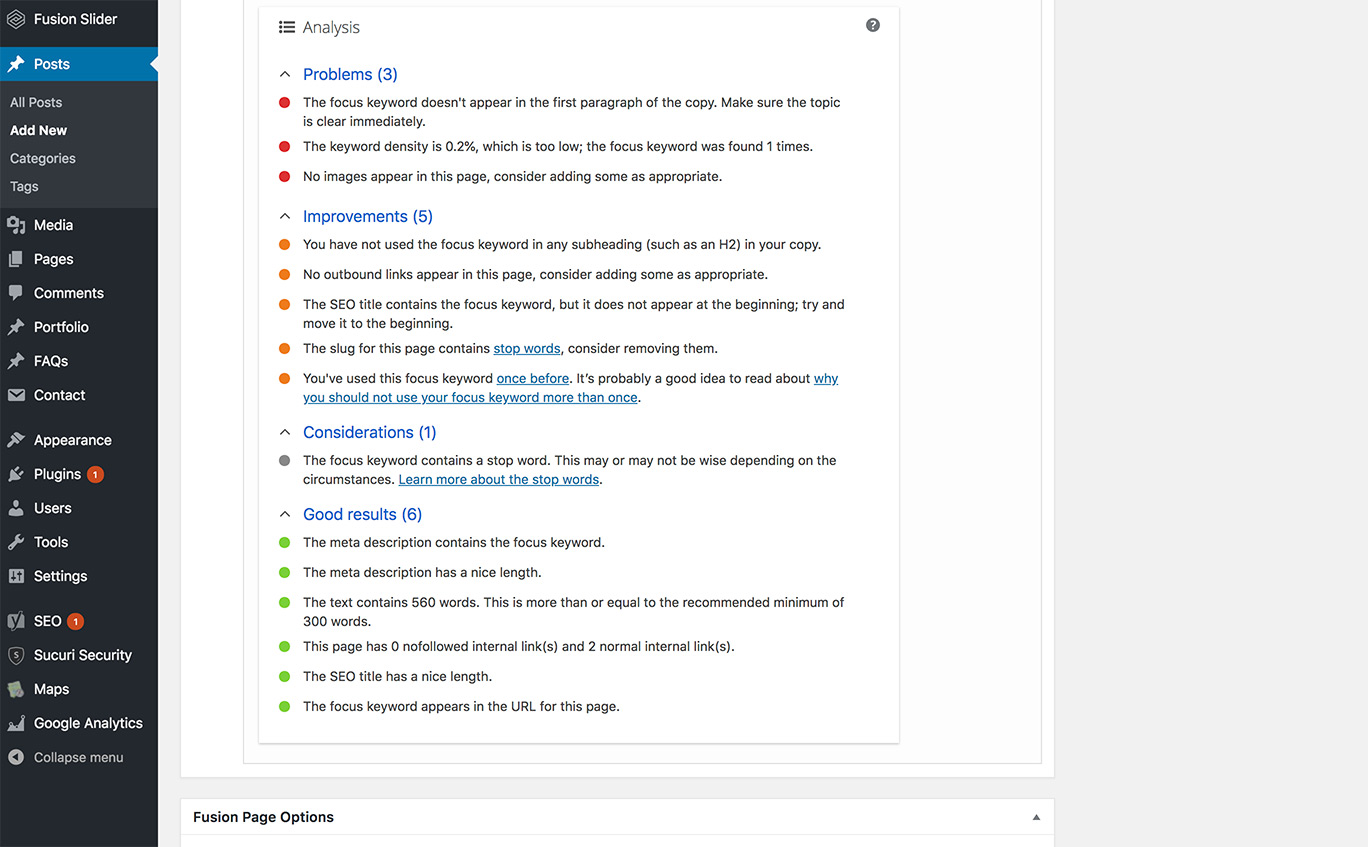
The Yoast plugin is very helpful in that it offers an analysis of your post and gives suggestions as to how to improve the post’s SEO. You can see the analysis box, located below the focus keyword section and then make adjustments to your post based on the tips.
6. Add Categories and Tags
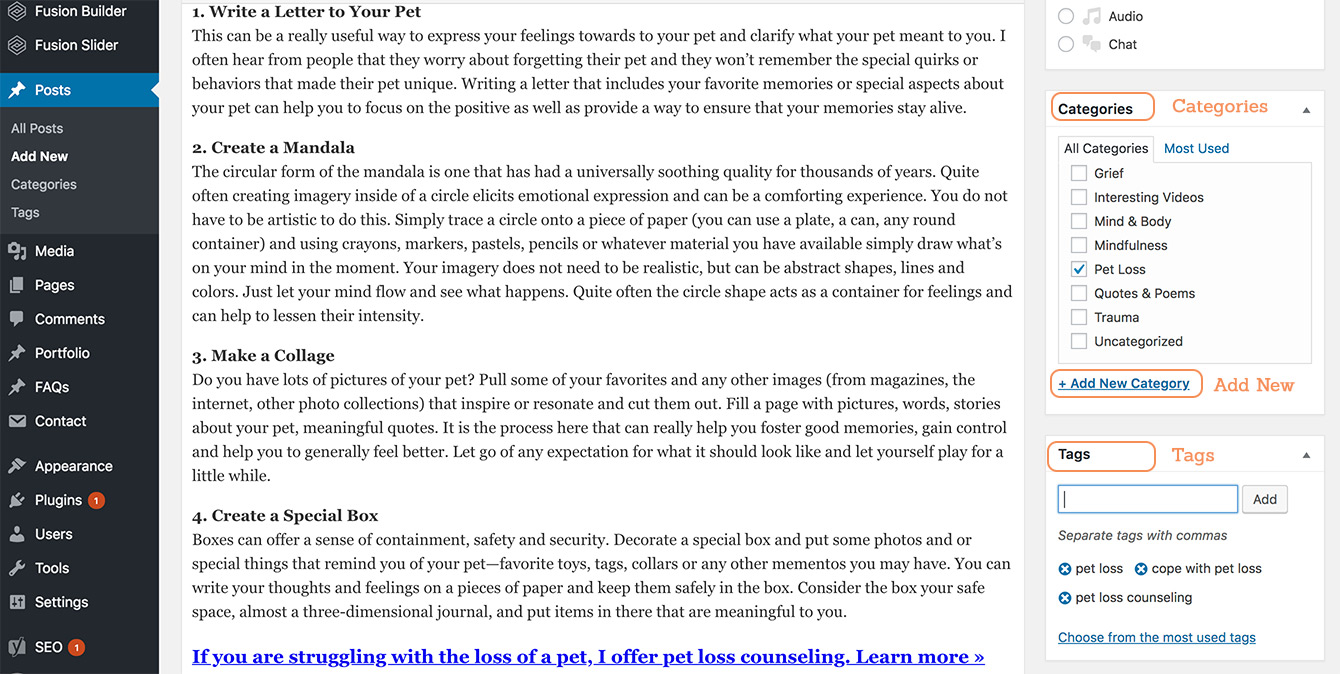
Moving over the right hand column on your screen, you’ll find the categories and tags boxes. Select a category that encompasses your blog post. If you are just beginning with your blog, you may need to add a new category. Click on the “Add New Category” link and type in the name of the category you want to add.
Tags are more specific than categories and should be tailored to the post. You can type in a few that relate to the post in the Tags box and click Add.
7. Add a Featured Image
Below the Tags box is the Featured Image section, where you can add an image that corresponds to your blog. You can find free stock images at pexels.com or unsplash.com. Images for about $10 each can be found at adobestock.com or shutterstock.com. Be sure you are using images that are legal to use and not just taking images you find through Google.
To add an image, click Set featured image.

A screen opening your Media Library will open. If you are adding a new image, click on the Upload Files tab, then the “Select Files” button.
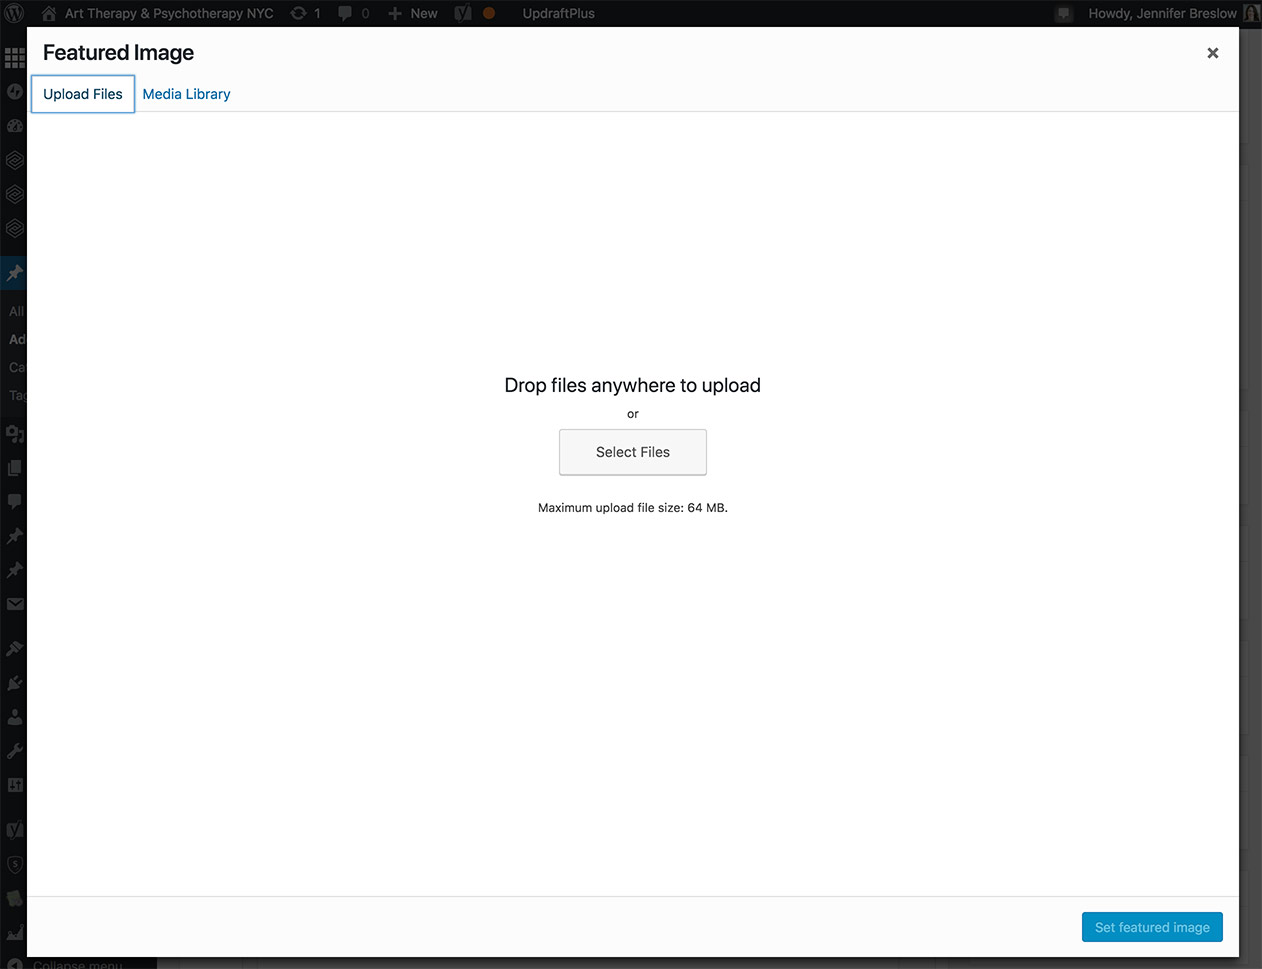
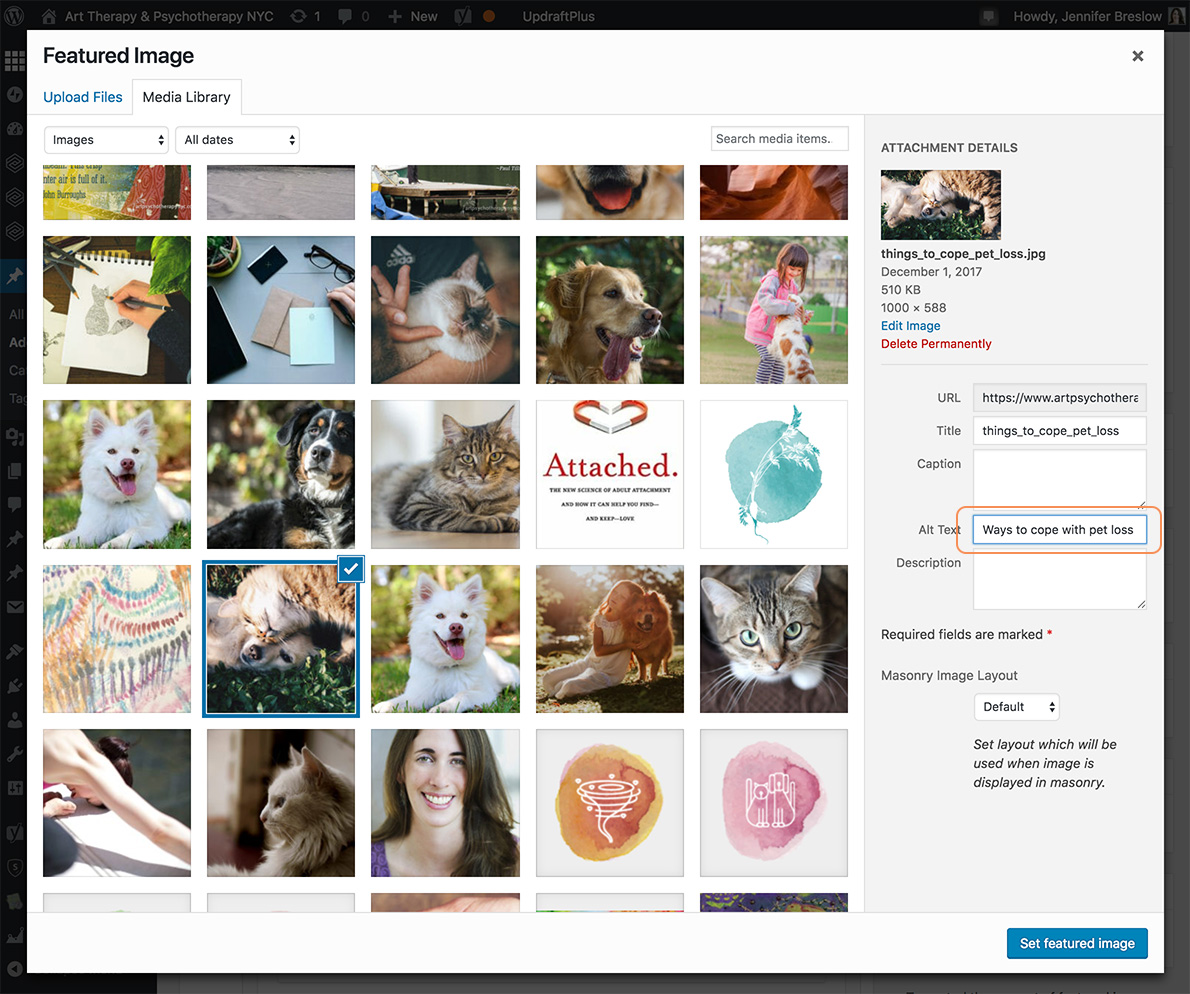
Find the image you want to upload on your computer and follow the prompt to upload the image. Select the image in the Media Library and be sure to fill in the Alt Text. Alt Text should contain the focus keyword that you are using on the page. Also be mindful that your images are not too large. They will slow down your site if they are too heavy. Click the blue “Set featured image” button to finalize the image.
8. Publish your post!
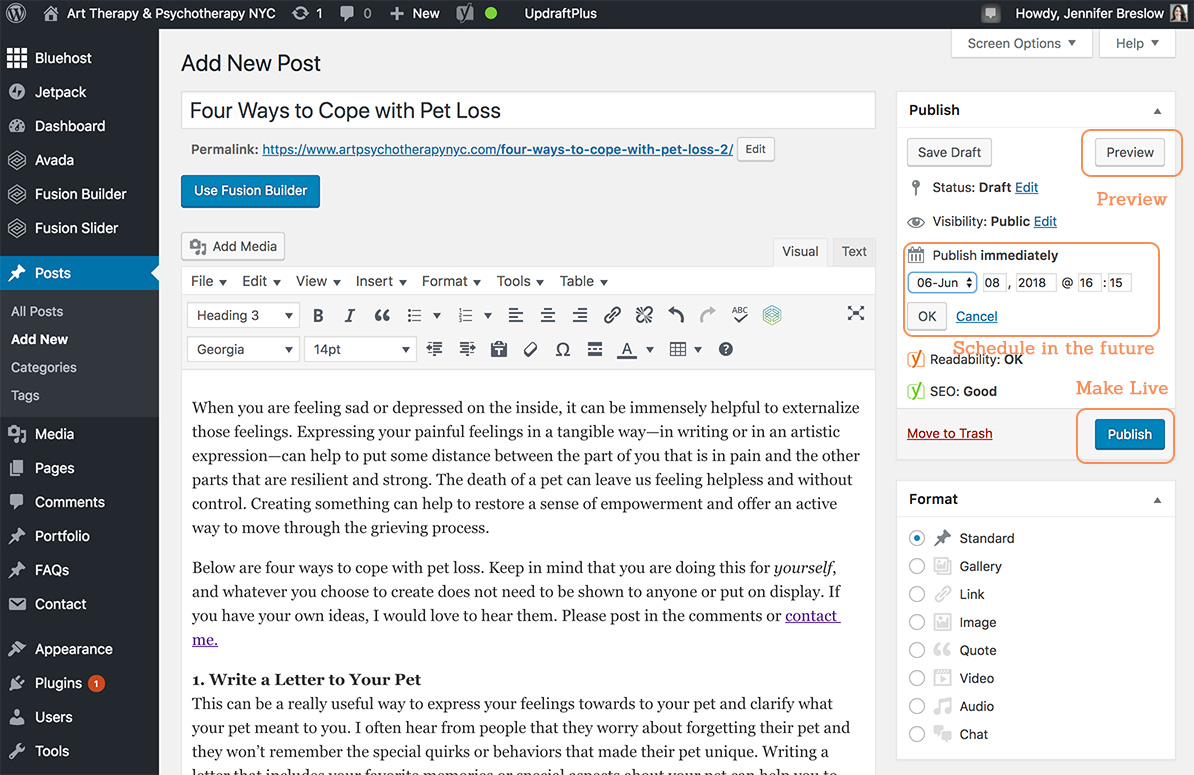
You are just about ready to publish your post! Scroll back up to the top of the screen. You will see a Publish box at the top of the upper left column. If you want to see what your post looks like before making it live, you can click on the gray Preview button. A new window will open, showing you what your post looks like. If you are happy with how it looks, you are ready to make the post live on your site. If you want the post to publish immediately, go ahead and click the blue Publish button. The post will now be live on your site.
If you want to schedule the post to go up some time in the future (this a great feature for batching your posts – you can write a bunch of posts at once and schedule them to post once a week, once a month, etc.) click on the edit link next to the “Publish immediately” text. It will open up a date selector and you can select the date you want your post to publish. Choose the date and then the Publish button will turn to Schedule. Click Schedule and your post is now set to post on the selected date.
Congrats on creating a new blog post!
